| New Distance Calculator: Calculate distance between clocking locations |
| When reviewing employees’ travel claims, how do you usually assess whether the mileage figure is reasonable? To help you easily and reliably estimate the distance travelled by the staff, in our August release, we’re introducing a new feature we refer to as the ‘Distance Calculator’. Admins can use this feature to calculate the travel distance between a user’s Clocking locations. |
| Here’s how it works: |
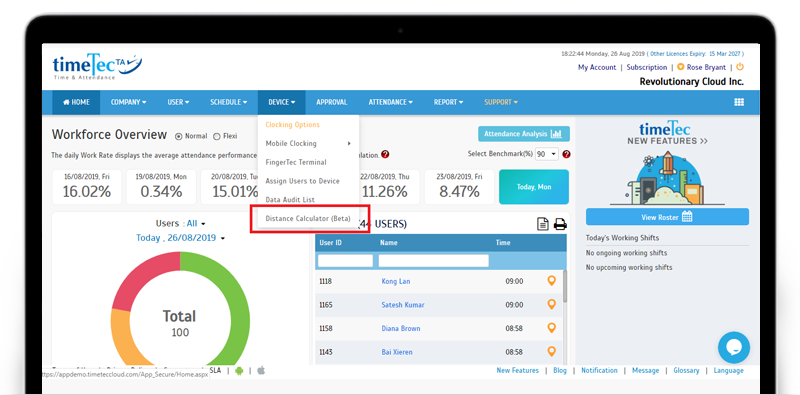
| i. Go to Device > Distance Calculator. |
| ii. Select the employee and date range; click the ‘Retrieve’ button. The system will list down all the Clocking locations within the selected period. |
| iii. Once all Clocking data and locations are listed, remove any unnecessary Clocking locations and click ‘Next’ to continue. (No GPS location information will be provided for FingerTec Terminal Clocking Data or for Mobile Clocking Data with disabled location option). |
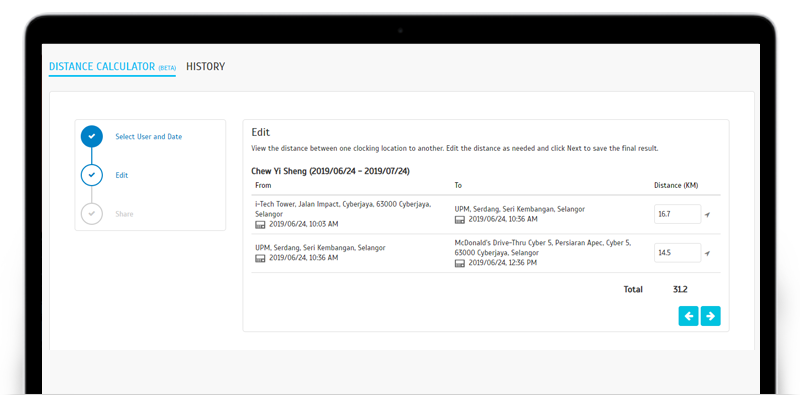
| iv. View the distance presented between one clocking location to another. Edit the distance as needed and click Next to save the final result. |
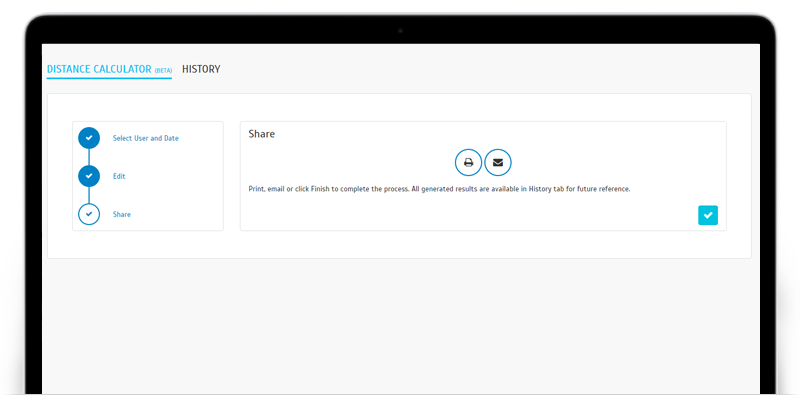
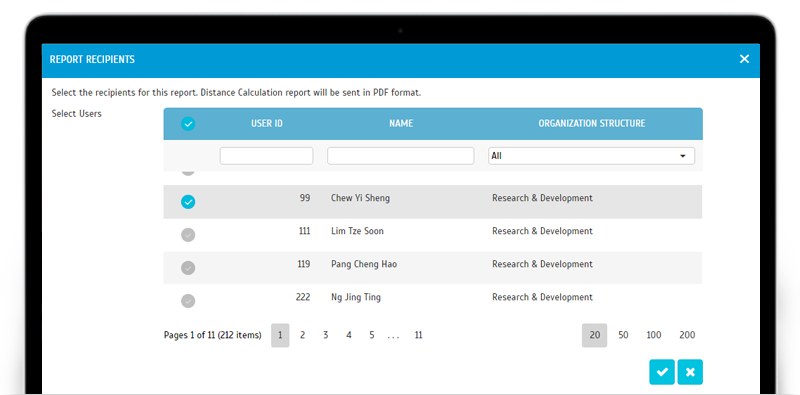
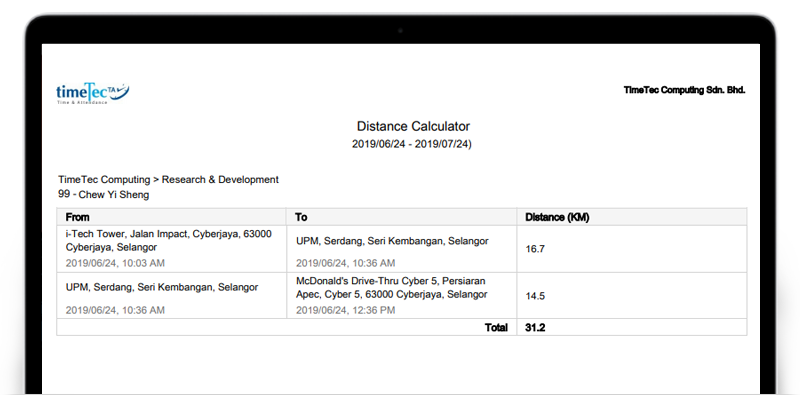
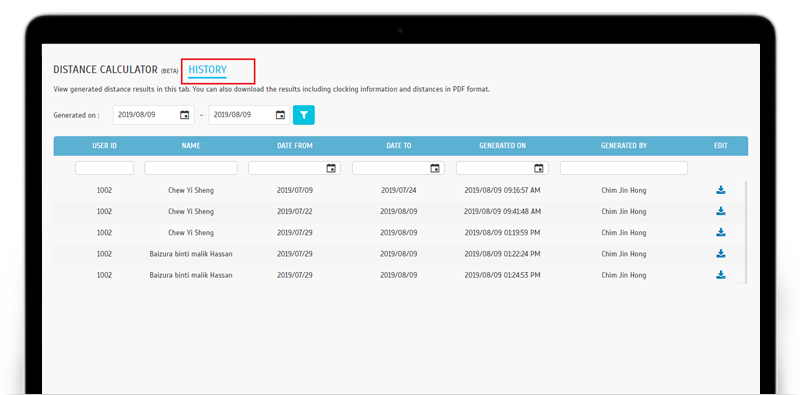
| v. Print, email or click ‘Done’ to complete the process. All generated results are available in the History tab for future reference. |
| Note: |
| i. The distance provided is only an estimation based on Google Map suggestion. Result may vary depending on the route suggested by Google Map. |
| ii. This ‘Distance Calculator’ feature is currently released as BETA version. Customers may incur additional charges after BETA as it is using Google Distance Matrix API. |
| Please refer to the screenshots below for more details: |
| a. Device > Distance Calculator |
 |
| b. Step 1: Select User and Date to process |
 |
| c. Step 2: View and Edit Distance |
 |
| d. Step 3: Print or email Distance Calculator Report |
 |
| e. Select Email Recipients popup |
 |
| f. Distance Calculator Report |
 |
| g. History Tab |
 |
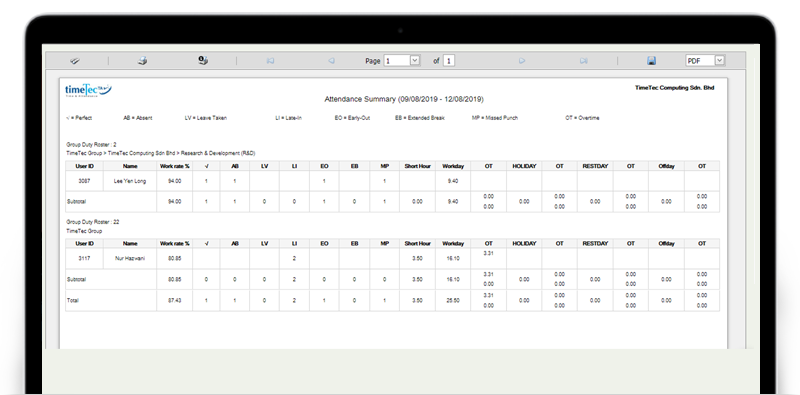
| Revamped Attendance Summary Report |
| For the Attendance Summary Report, we’ve just updated the design of the table (e.g. borders, header) to achieve a clearer display of information. |
 |
| Added ‘Alias’ Field in Staff Contact |
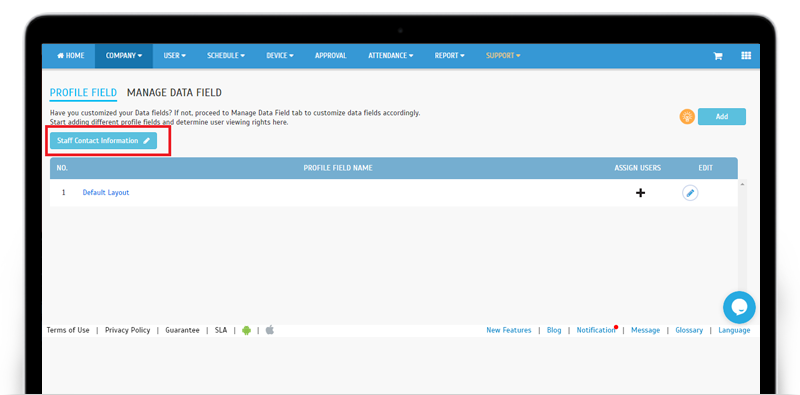
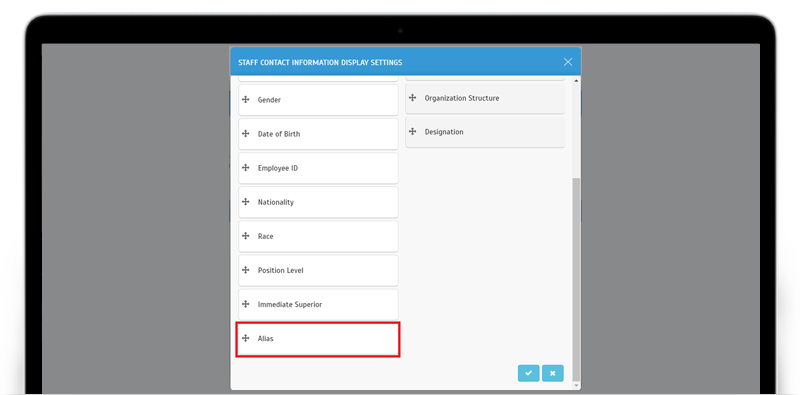
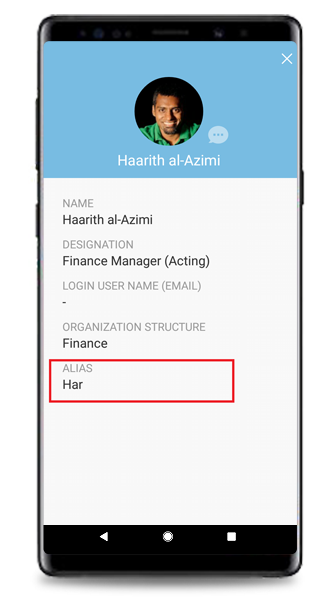
| Following customer’s request, we’ve added an ‘Alias’ field at the Staff Contact Information Display Settings. Generally, with this setting, Admins are allowed to choose up to a maximum of ten data fields from users’ profiles that will be displayed when employees view Staff Contact details. |
| Go to Company > Profile Field > Click on ‘Staff Contact Information’ button to access the settings window. You will see the new field, ‘Alias’ listed here. |
| a. Staff Contact Information Display Settings |
 |
 |
| b. Staff Contact View |
 |
| Added Employee Handbook at System Settings |
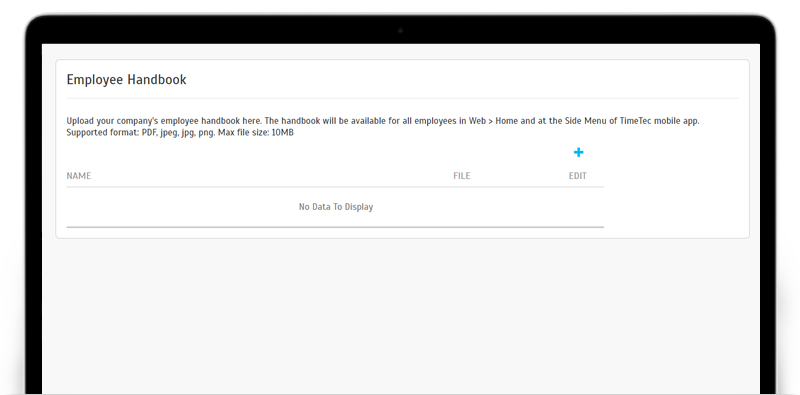
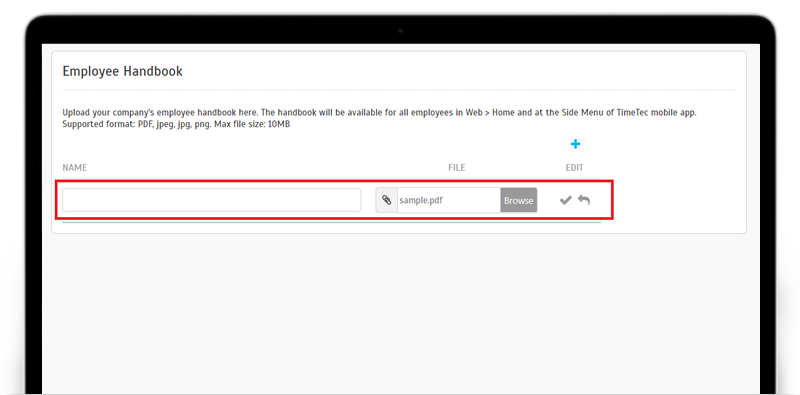
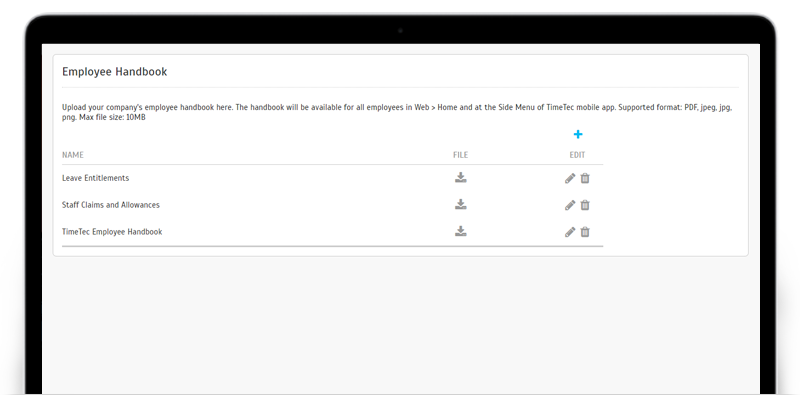
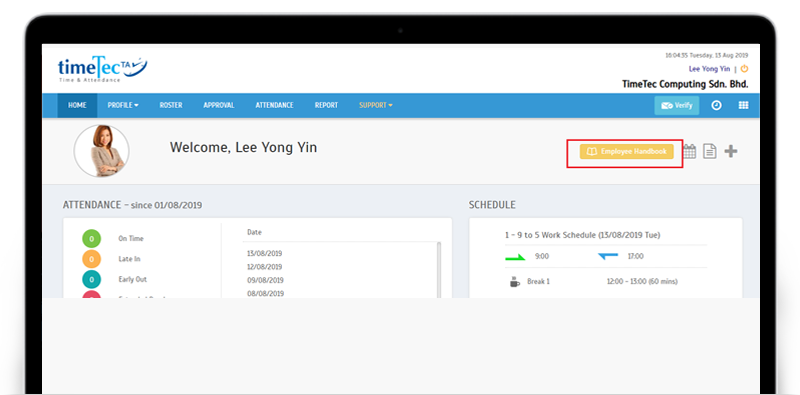
| Would you like to share your company’s Employee Handbook and other important codes, policies or guidelines within the TimeTec application? Besides using the Library feature, there is now another way: the Employee Handbook option that we’ve just added to System Settings. Go to System Settings to upload your company's Employee Handbook. Multiple files are allowed. The uploaded file(s) will be available for all employees in the Web application (Home page) and at the Side Menu of TimeTec Mobile app. Supported format: PDF, jpeg, jpg, png. Max file size: 10MB |
| Admin Settings a. Admin Login > Company > System Settings > Employee Handbook |
 |
b. System Settings > Add Employee Handbook |
 |
c. System Settings > Employee Handbook List |
 |
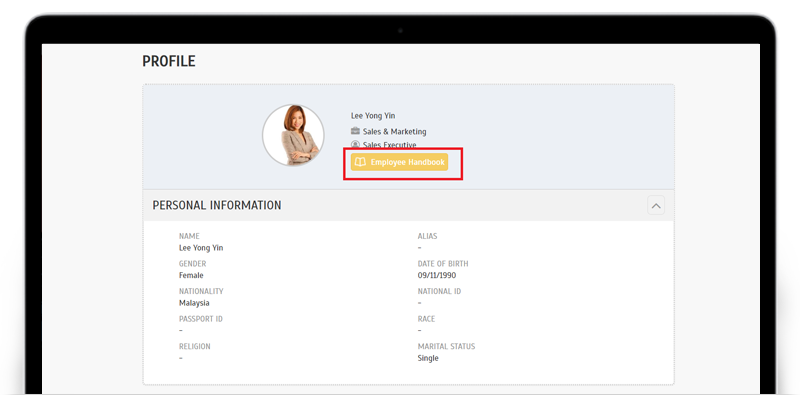
| User Download a. User Login > Profile > Employee Handbook |
Users can access the Employee Handbook by going to Profile page either at TimeTec Profile or TimeTec TA. |
 |
| b. User Login > Dashboard |
 |
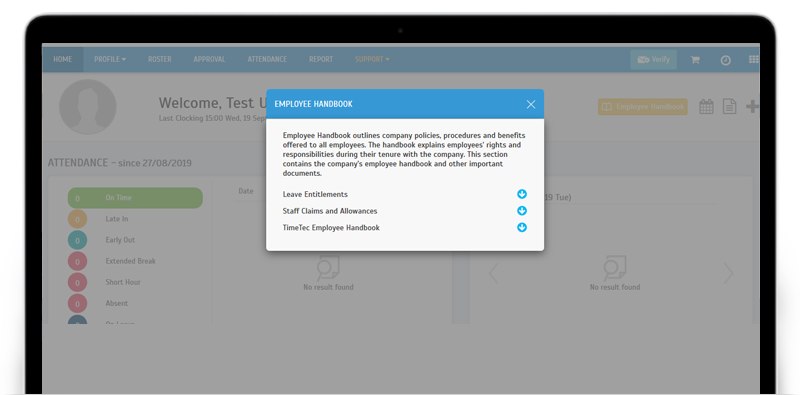
| c. Employee Handbook Pop Up |
 |
| TimeTec Profile Updates |
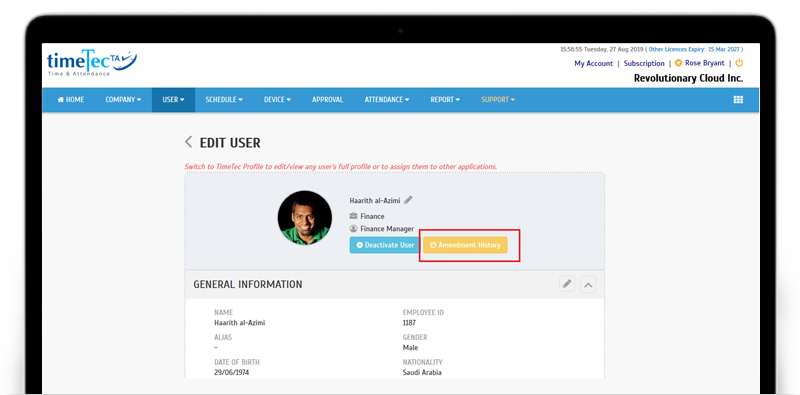
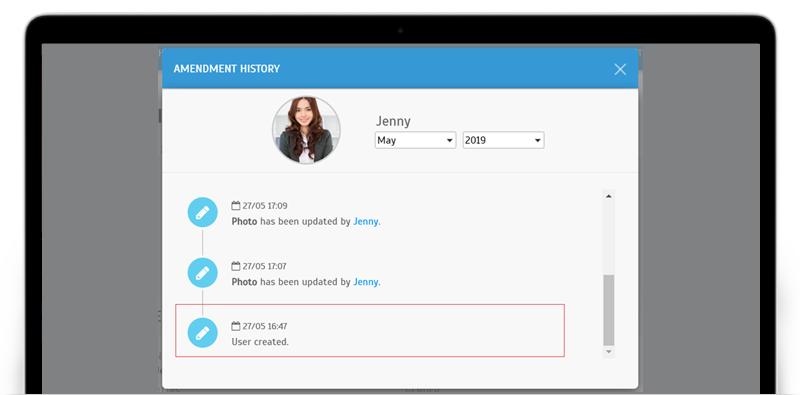
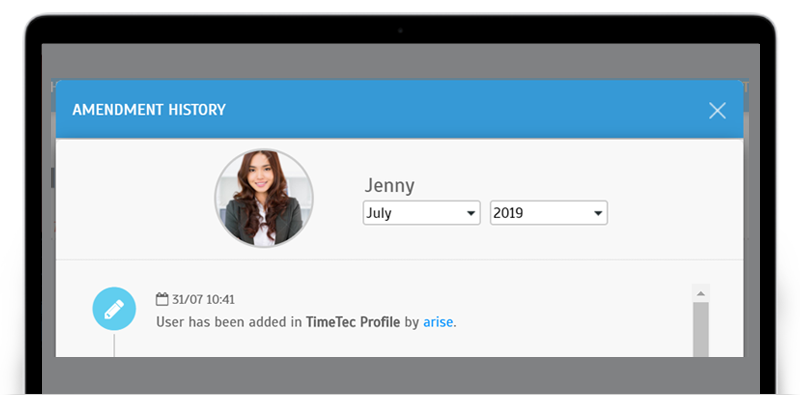
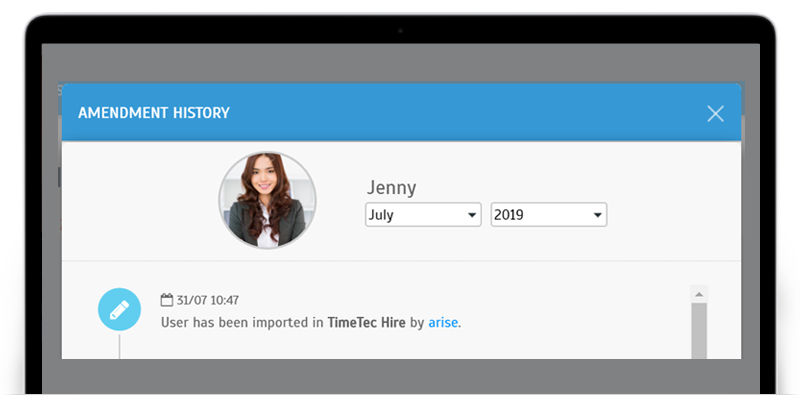
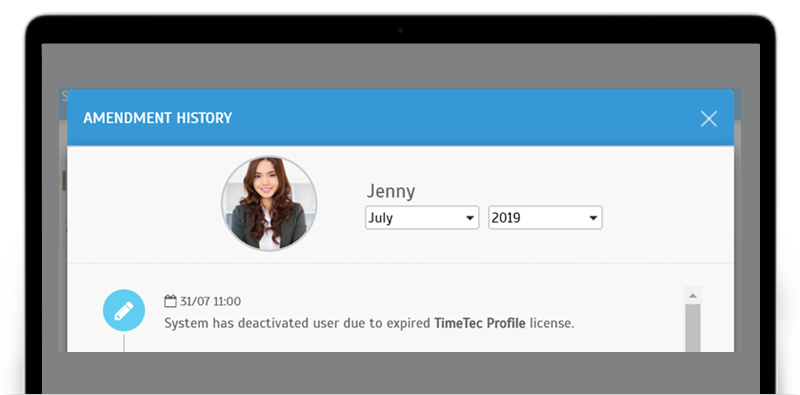
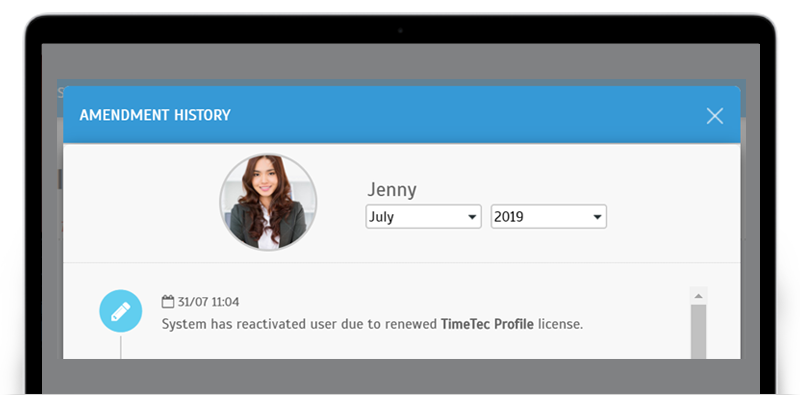
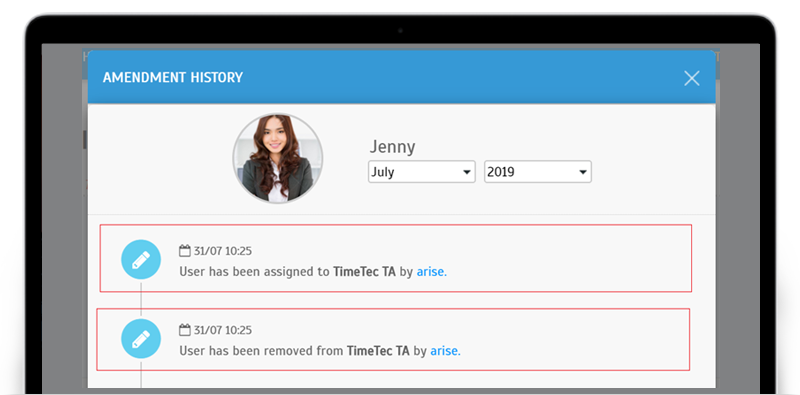
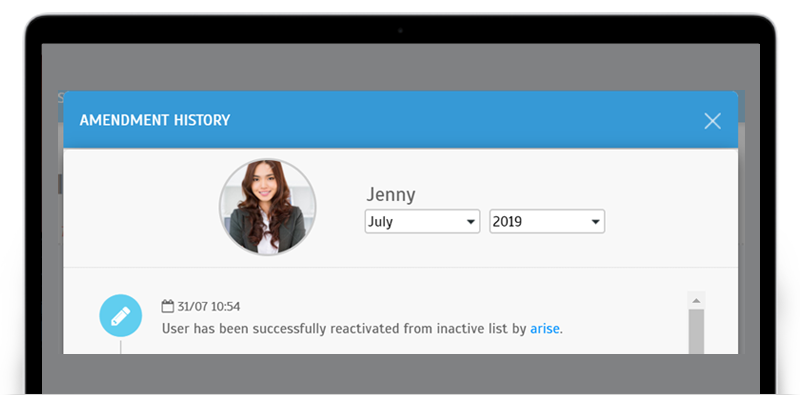
| 1. Enhancement of User Profile Amendment History Recently, in TimeTec applications (including TimeTec Profile and TimeTec TA), we’ve enhanced the Amendment History function at Manage User in order to improve accountability. After this update, when Admins or the system make any significant changes to a TimeTec user, such as adding, deactivating, reactivating, assigning the user to a TimeTec application and etc., the record of these actions or changes will be displayed in the Amendment History. |
| Please refer to the sample screenshots below for further details: a. Edit User > Amendment History |
 |
b. Existing User Amendment History |
 |
c. Add User |
 |
d. Import User |
 |
e. Deactivated due to license expired |
 |
f. Reactivated due to license renewed |
 |
g. Assign User /Unassign User |
 |
h. Reactivate from Inactive list |
 |
| TimeTec TA App Update |
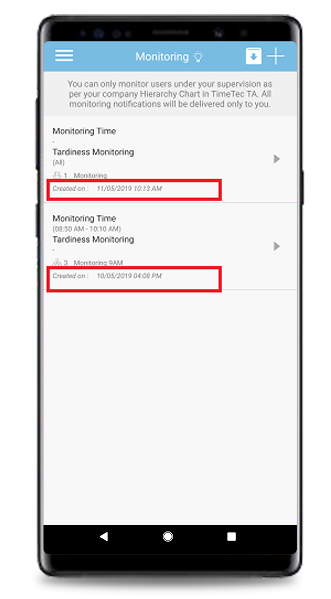
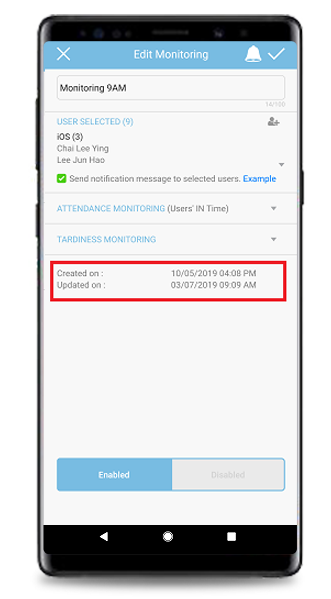
| 1. Monitoring
Display the Created time in the Listing page. Display the Updated time and Created time inside the Setting page. |
  |
|
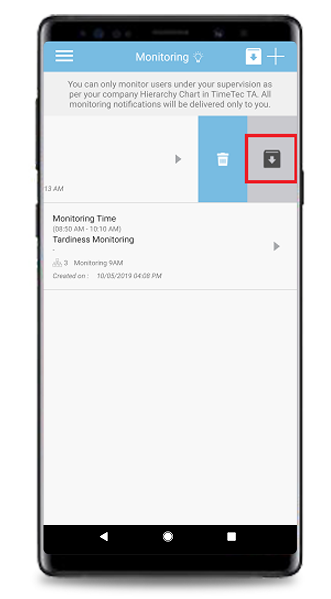
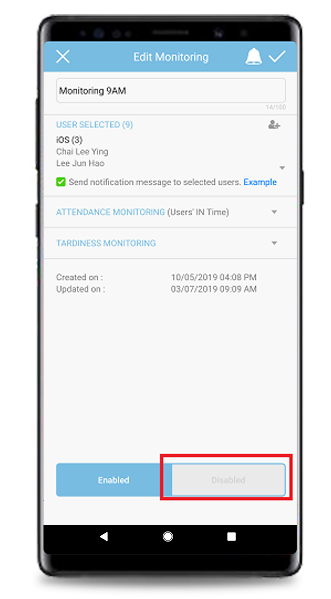
Added an ‘Archive’ feature.
- To disable (archive) a Monitoring setting- Swipe left to select the ‘Archive’ icon. Otherwise, go to Edit and select the ‘Disabled’ button. |
  |
|
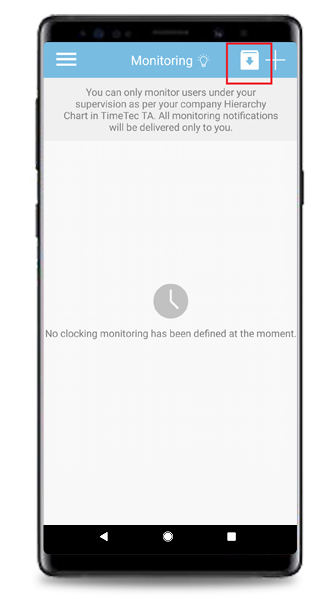
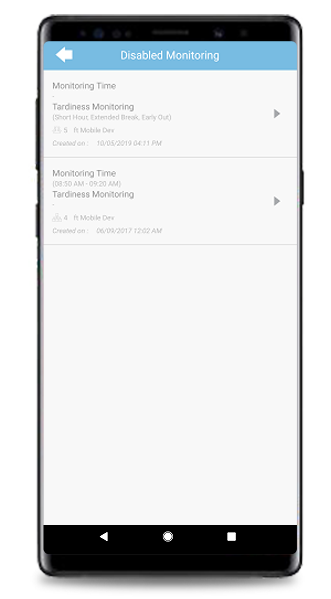
- There is a new listing page for all Disabled Monitoring settings. Tap on the ‘Archive’ icon to view this page. |
  |
|
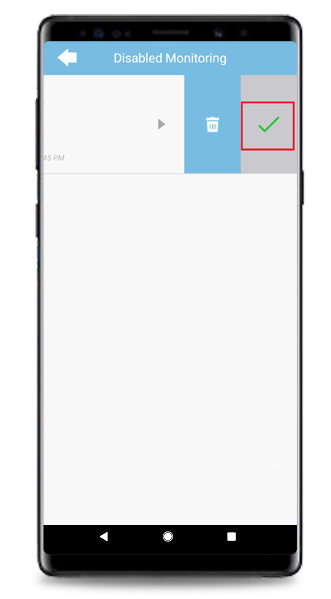
- To reactivate a Monitoring setting- Swipe left to select the Enable icon. |
 |
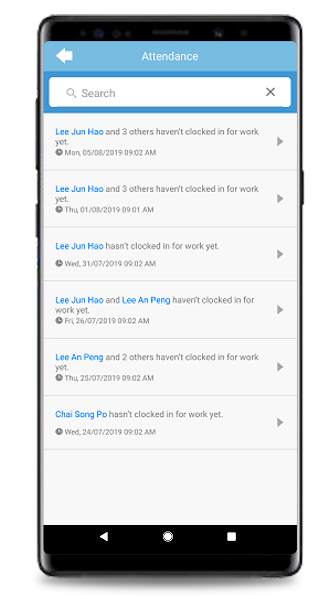
| Added Notification Quick View. |
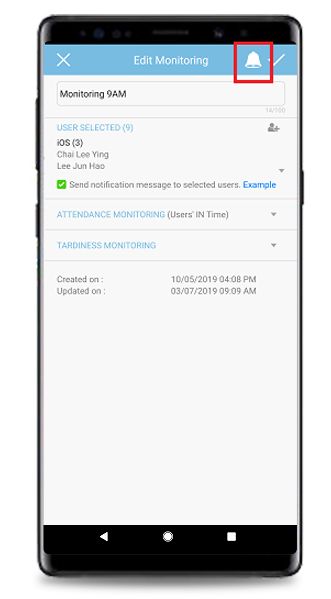
| Go to Edit and tap on the Notification button. The App will only display notifications that are relevant to the selected Monitoring setting. |
  |
| 2. General
Optimization for Memo and Wi-Fi. Upgraded Swift to version 5.0 for iOS. Upgraded Android SDK to 28. |
| Previous Issue: July 2019 • June 2019 • May 2019 |
| Note: If some of the screenshots or steps viewed here are different from the ones in the current system, this is due to our continuous effort to improve our system from time to time. Please notify us at info@timeteccloud.com, we will update it as soon as possible. |
© 2019 Timetec Computing Sdn. Bhd. All rights reserved.
